NativeChurch
Multi Purpose Wordpress Theme
A set-up guide and general information to help you get the most out of your new theme.
- Updated: 09 May, 2015
- By: imithemes
- Support: support.imithemes.com
- Email: envato@imithemes.com
Thank you for purchasing 'NativeChurch - Multi Purpose Wordpress Theme'. This document covers the installation, set up, and use of this theme and provides answers and solutions to common problems and issues - we encourage you to read this document thoroughly if you are experiencing any difficulties. If you have any questions that are beyond the scope of this document, feel free to post them in the dedicated Support Forum. Thanks so much!
NativeChurch is a full functional powerful Wordpress Theme designed & developed for Church, Charity, Non-Profit and Religious Websites and comes handy for Portfolio & Corporate Websites. It is fully responsive wordpress theme based on Twitter Bootstrap 3.0 framework that makes it available for all screen sizes from the bigger ones to smartphones. Its not only responsive whereas it is retina ready also, now no blurry images on your HiDPI and retina devices.
How to use NativeChurch Template?
NativeChurch is very easy to update and modify, it will adapt your website and brand in no time. Steps for modification and updating are described step by step in this exclusive documentation.
Installation
Tip: Before uploading the theme make sure you unzip the theme download and inside of the download folder upload the zip called “NativeChurch-Theme.zip”
To install this theme you must have a working version of WordPress already installed. For information in regard to installing the WordPress platform, please see the WordPress Codex – http://codex.wordpress.org/Installing_WordPress
Installation
When you are ready to install a theme, you must first upload the theme files and then activate the theme itself. The theme files can be uploaded in two ways:
FTP Upload: Using your FTP program, upload the non-zipped theme folder into the /wp-content/themes/ folder on your server.
WordPress Upload: Navigate to Appearance > Add New Themes > Upload. Go to browse, and select the zipped theme folder. Hit “Install Now” and the theme will be uploaded and installed.
Once the theme is uploaded, you need to activate it. Go to Appearance > Themes and activate your chosen theme.
Theme Updates
Using Envato WordPress Toolkit - preferred method
You can install any theme you purchased on the ThemeForest by installing Envato WordPress Toolkit plugin. Just follow this tutorial. This is the preferred method, because you will be able to update the theme to newer version (we are continuously improving all our products) from the WordPress dashboard, like you update the plugins or official themes.
Upload a zip file
When you are logged in your WordPress go to Appearance » Themes » Install Themes » Upload and select the zip file NativeChurch.zip you downloaded from the ThemeForest and click Install Now button. Before doing this change your old NativeChurch folder name using ftp client of your choice
FTP upload
Unzip the contents of the NativeChurch.zip file and upload the folder named NativeChurch to your server to wp-content/themes/ folder using FTP client.
Plugins Installation
Tip: These plugins is completely free and available on WordPress.org
Page builder, Social Shareing Widget, Donations, Paid Events, Breadcrumbs, Multiple Sidebars we are using few free plugins and some custom made plugins.
Installation
As soon as you activate the NativeChurch Theme it will show up a message at top for the recommended plugins. Just go to Install Plugins page straight from the message box and follow up the screen instructions for further process. Please nore you need to activate the plugins after the installation to get them to work for you. You can always check for recommended and required plugins at Appearance > Install Plugins
Installing the Demo Content
Tip: This is optional step but highly recommended. This will make your website look like the demo you see while purchasing this theme. You should activate all the recommended plugins before importing the content file.
This theme comes with a "One Click Demo" install interface which is located at Theme Options > Demo Importer. This option works great on a fresh wordpress install and it is recommended as well. Just click the "Import Demo" button and wait for couple of minutes for the theme to download all posts and placeholder images from our server. Once done you will just have to do some dimple steps
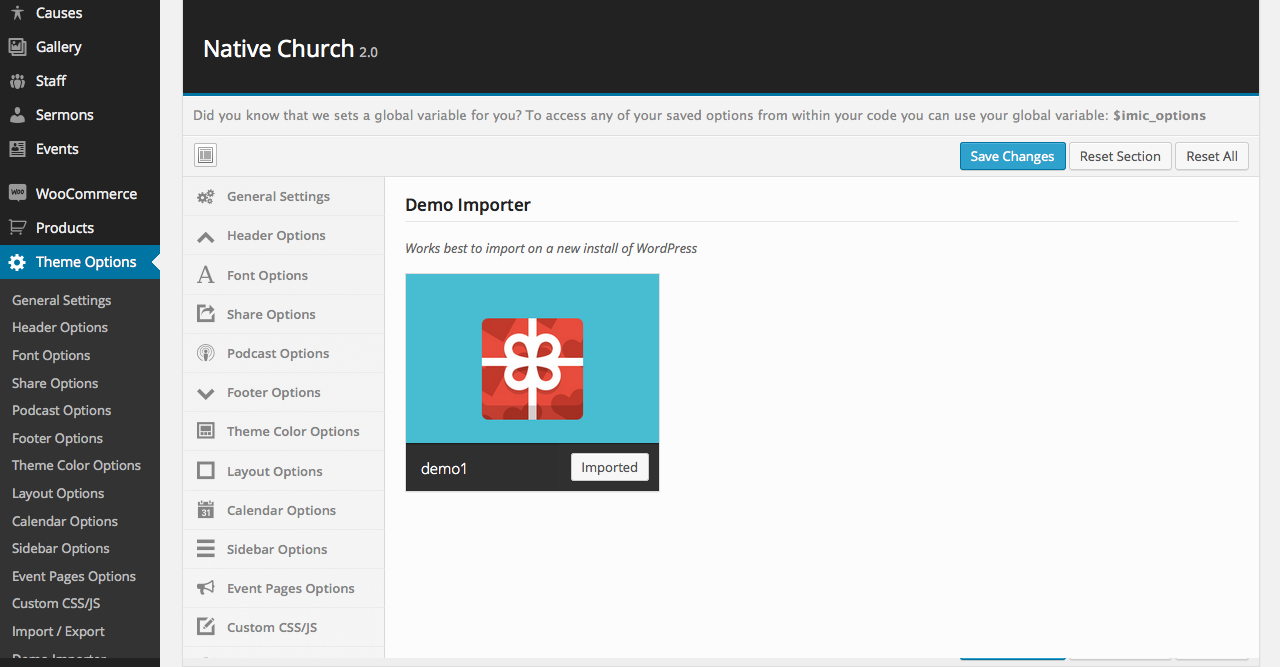
- Remove all default widgets from Homepage sidebar at Appearance > Widgets
- Check the options for posts list on your homepage as described here
Using traditional way of importing demo content
If you wish to the demo content via wordpress importer plugin and using wp native import command. For this you need to have the wordpree importer plugin installed on your website
Once installed activate the plugin (This step is not necessary if you already have the import plugin installed)
Now select the XML file from your theme download file "content.xml" , it will be in a folder called “XML Dummy Content”
Once uploaded it will ask you to import the data into your WordPress user account select from the drop-down an existing user, also click on the check box that says “Download and import file attachments” Once complete all the data will be imported into your site.
Setting up the Homepage
Tip: This is the most important step to get your homepage show up as like the demo and use the template for homepage
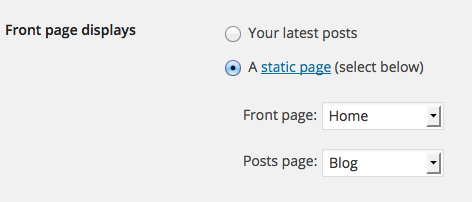
To set up the homepage navigate to Settings > Reading and configure the “Front Page Displays” setting. Select the static page option and choose the home page as your front page and "blog" page as your posts page.
Assigning menus to their repective positions just move to Appearance > menus

Using Page Builder
Make sure you install all the required plugins before using the builder or reading documentation below. Required plugins for page builders are: SiteOrigin Panels, SO Widget Bundle, Black Studio Tinemce Widget
ACTIVATING THEME BUNDLED WIDGETS
Before using the theme widgets in page builder they need to be activated from Plugins > SiteOrigin Widgets
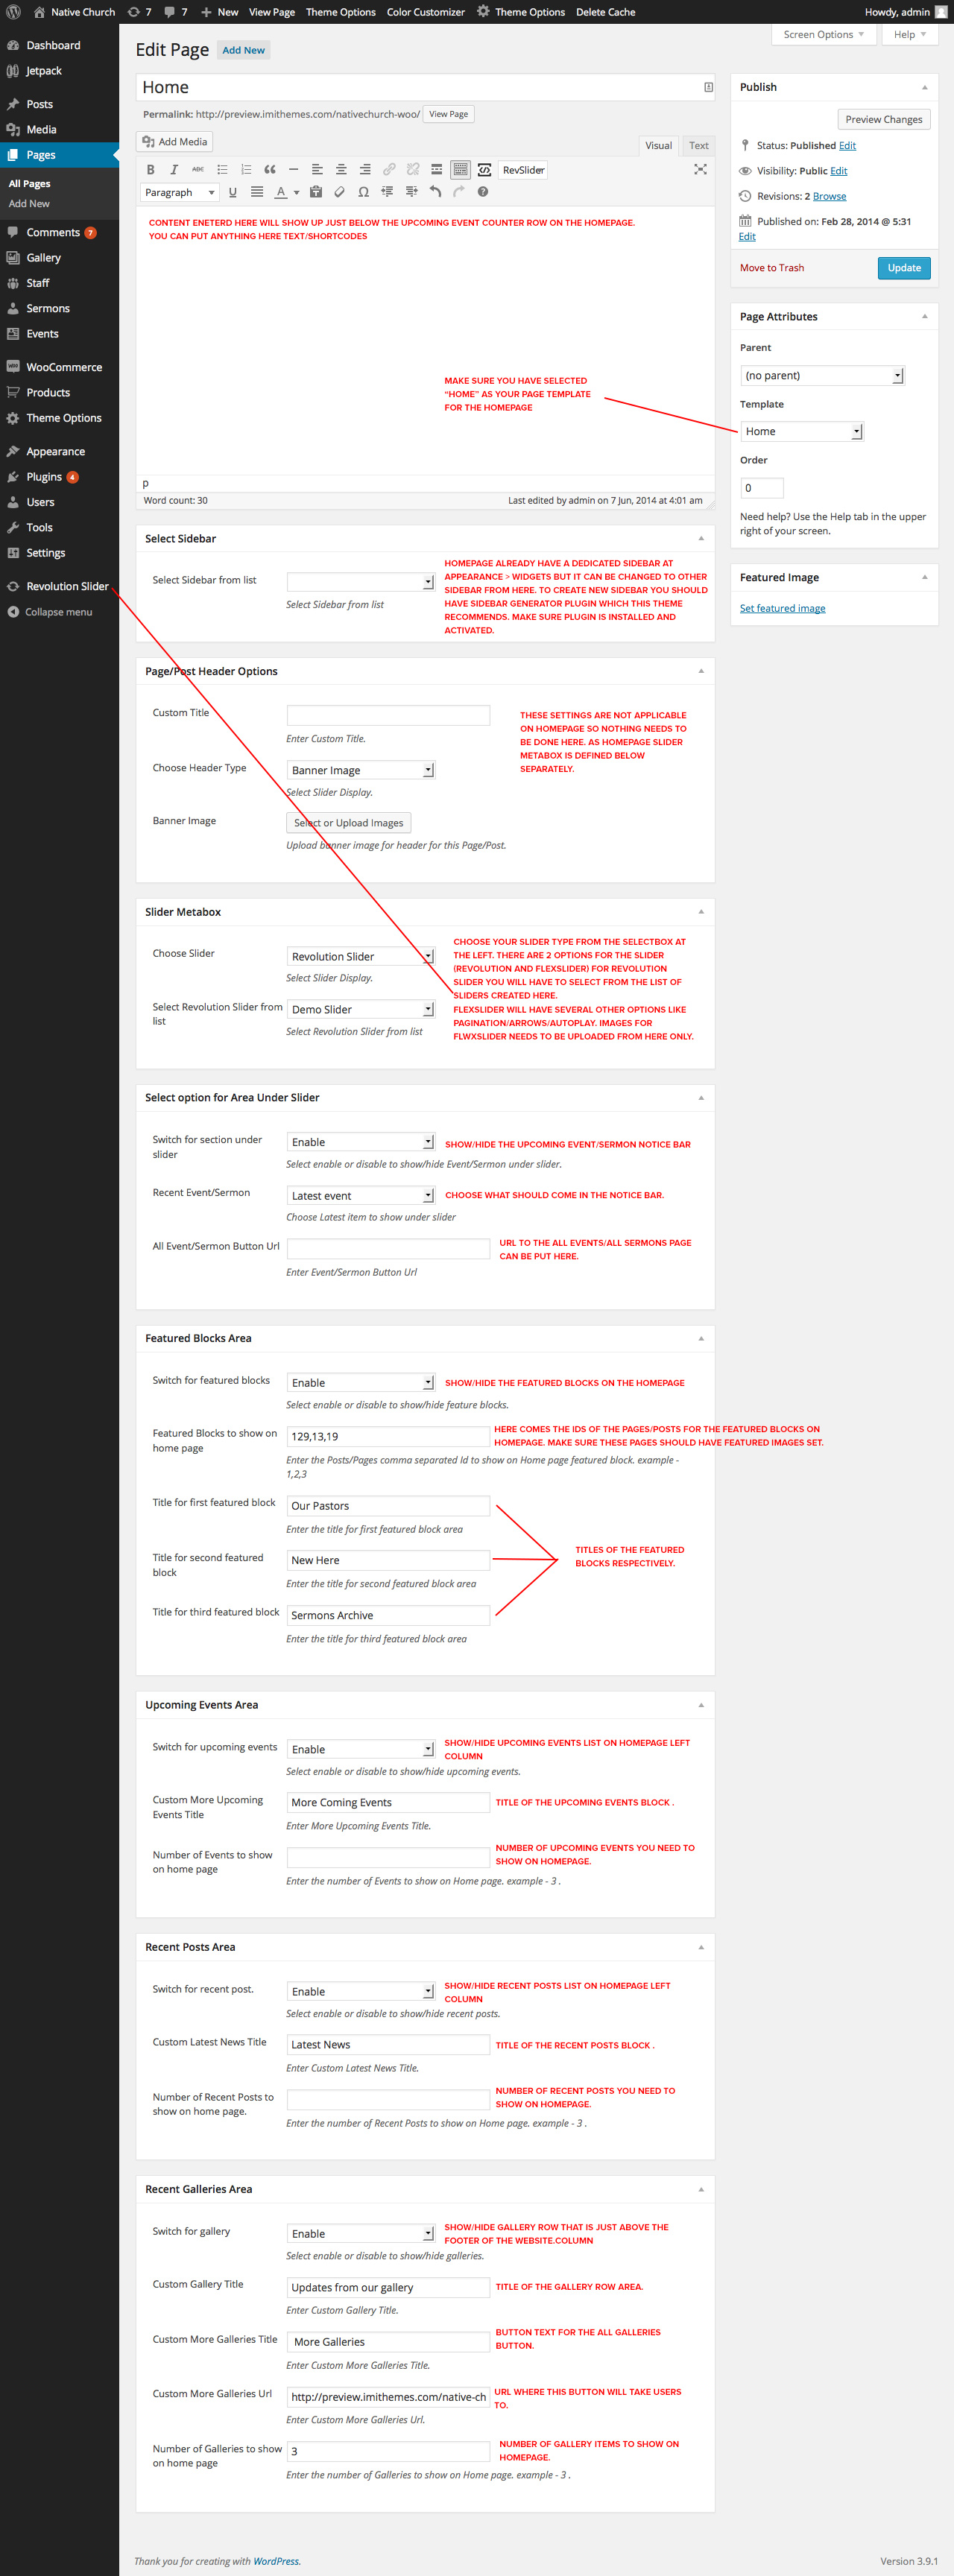
Managing Homepage Content
Creating Posts/Pages/Causes/Events/Staff/Sermons/Gallery
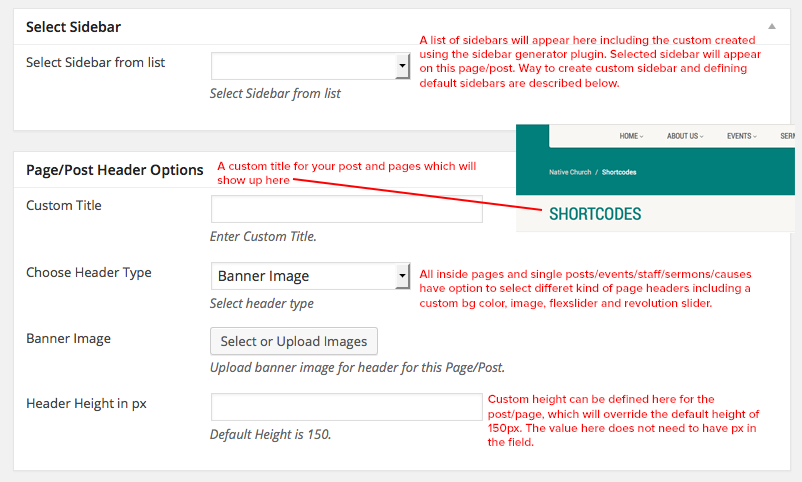
Default Custom title and sidebar options for all posts types and pages other than homepages
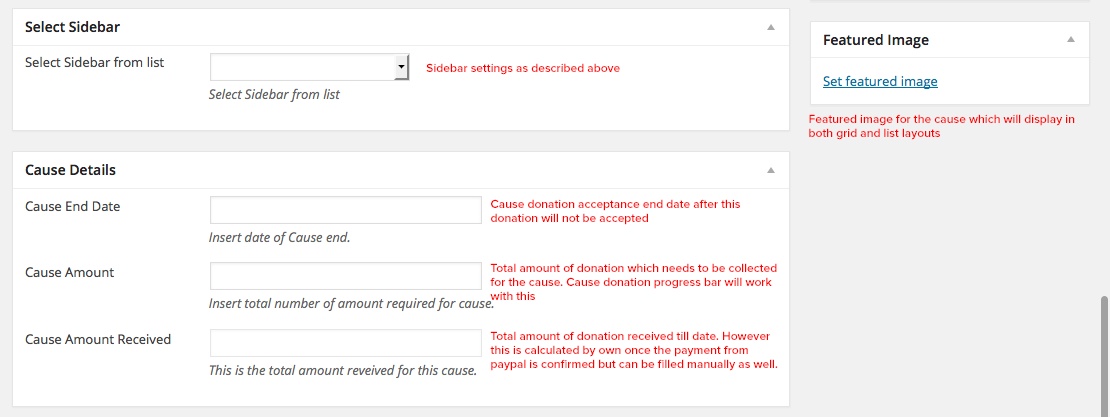
Creating a cause
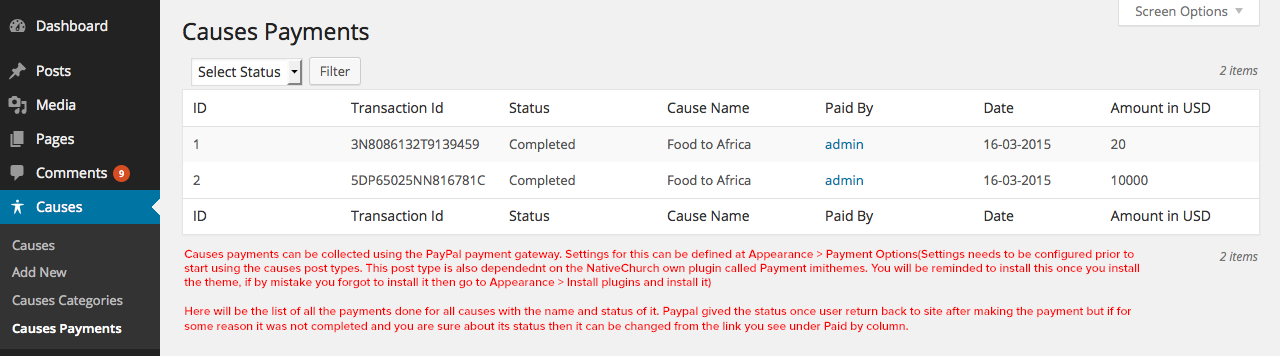
Causes Payments
Creating a gallery item
Title of these posts can be used as separate gallery image/item title when listed using pre defined templates
Gallery items are separate posts that can be used to display a full set of items in a page using predefined gallery templates. It supports post formats for you to use. There are 4 formats for the gallery posts
- Image: While creating a new gallery item choose the format of the item from the right sidebar of the page

For image format a featured image needs to be added only - Video: Video format of gallery item support youtbe and vimeo videos which require you to put in your URL of the video, once you select format video from the list as shown above, a new meta input field will appear at the left of the screen. Featured image will work as a display image on the gallery listing page which on click will show the video in a lightbox
- Link: This format will take the user to entered link on click of featured image inserted for this post
- Gallery: This format actually works like a slider and display as a bunch of images sliding/fading as per the configuration set

Featured image for this will be the first display image and in lightbox will be displayed along with other uploaded images.
Creating a Staff member profile post

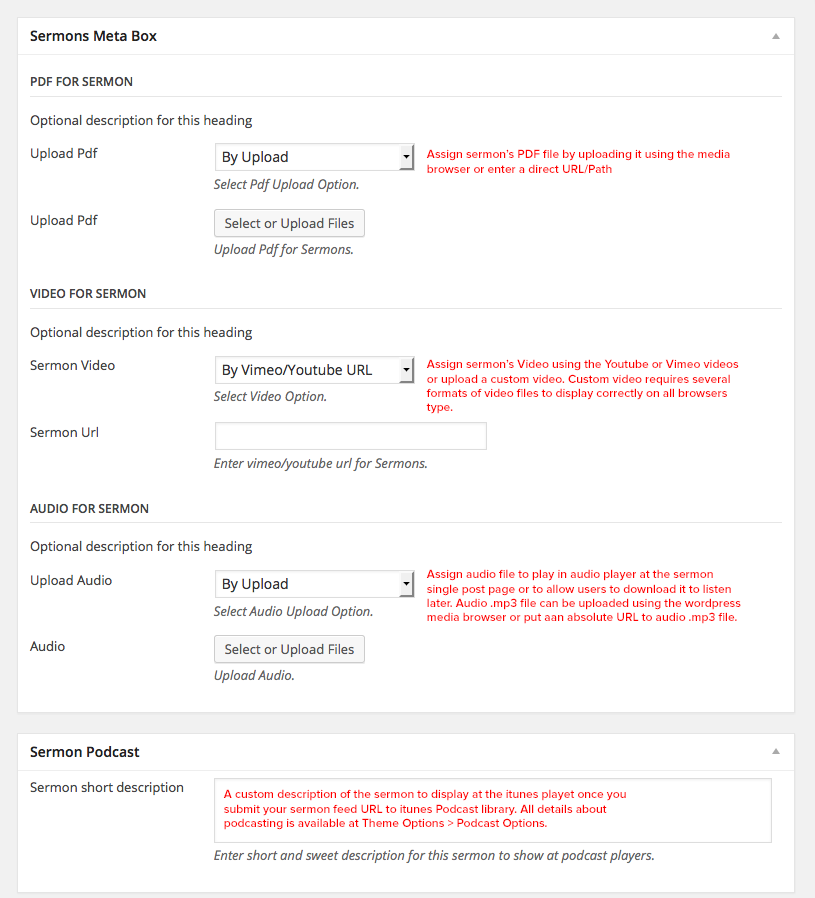
Creating a Sermon Post
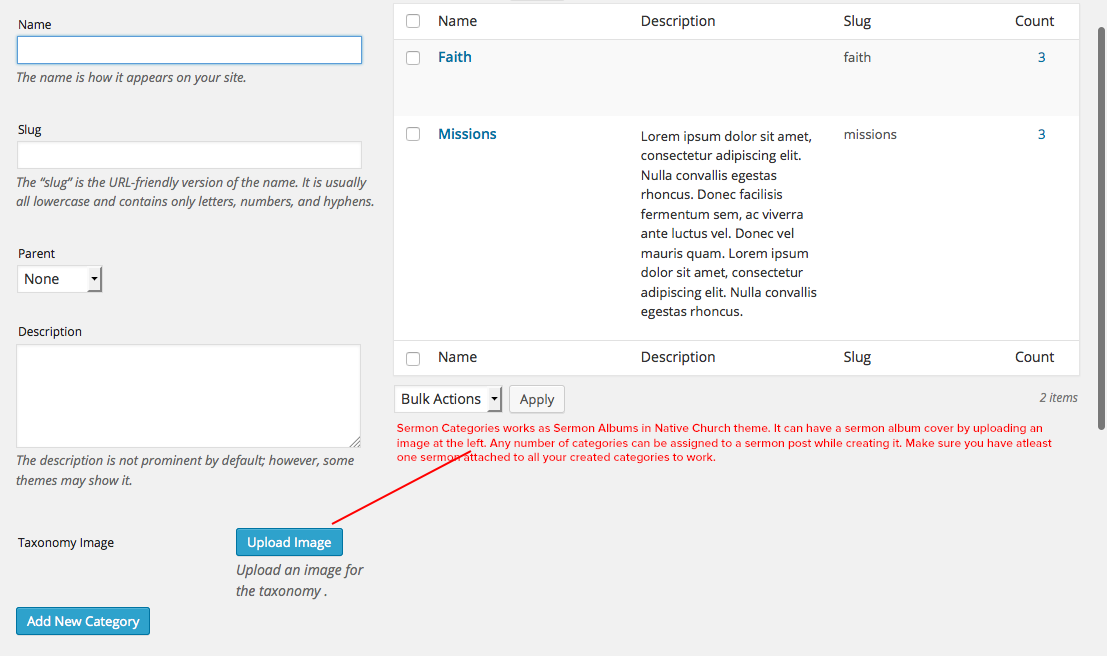
Sermon Categories
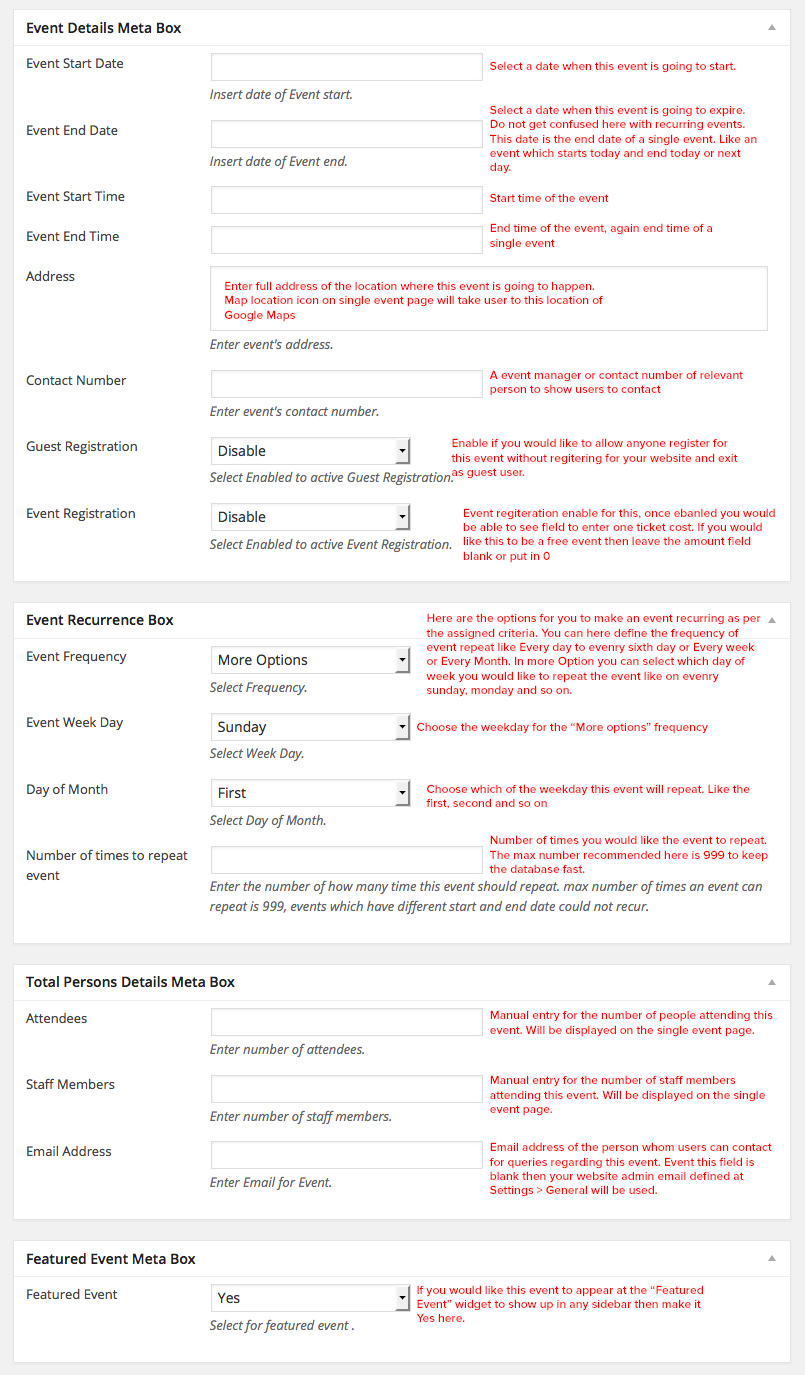
Creating an Event
Creating Mega Menus
NativeChurch theme comes with mega menu creation plugin built in. See below image for its decription or see this post for more info: http://support.imithemes.com/forums/topic/how-to-create-a-mega-menu/

How to get your google calendar API key and ID to use for showing your Google Calendar Events in your Native Church Calendar
Google application api key needs to be entered to get the access of the calendars. To optain an api key just login to your google account and go to this URL: https://console.developers.google.com/project . Here you need to create a "New Project" a quick popup will come to enter the project name. Enter any name of your liking which you can remember as your website Google Calendar Events. After clicking the create button it will take few seconds to get it completed. Once its done click on "Enable and API" button to generate api key. On the next page search for "Calendar API" and click that link. On the enxt page toggle the "Off" button to make it "On".
Now on the left sidebar you can see "Credentials" link under APIs and auth heading. Click on it and on the next page click button create new key. On the popup opened click "Browser Key" and then click "Create". Done. Now you can see your API key on the following page. Just Copy that and paste at the Theme Options > Calendar Options.
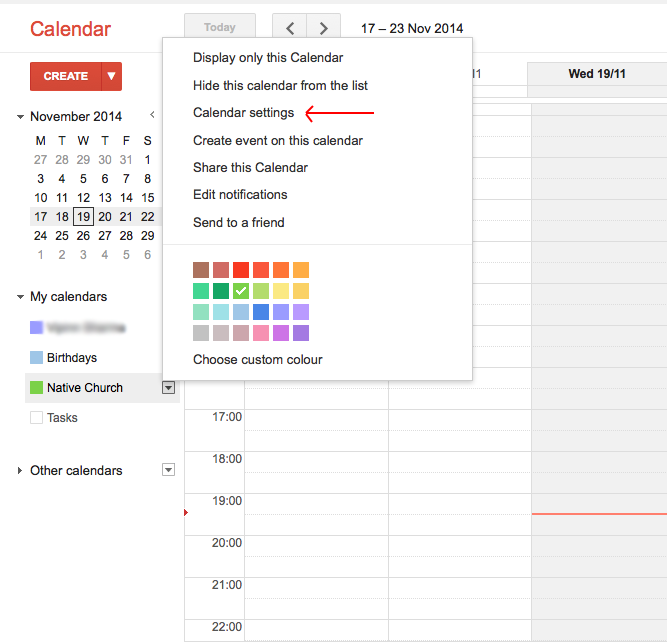
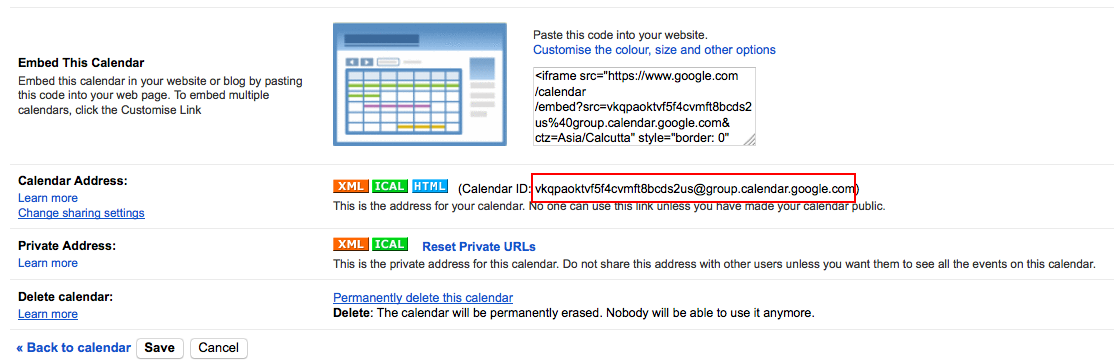
Next step is to get your Google Calendar "ID" and to get that go to your Google Calendars page here and click on any calendar's arrow which you want to share at the left sidebar under "My calendars" tab. On the popover click on "Calendar settings". Now on the next page you will find the calendar ID which needs to put at Theme Options > Calendar Options.
How to use shortcode
Accordion
[accordions id="Accordion"]
[accgroup]
[acchead id="Accordion" tab_id="Accordion0" class="active"]Accordion Panel #1[/acchead]
[accbody tab_id="Accordion0" in="in"]Accordion Body #1[/accbody]
[/accgroup]
[accgroup]
[acchead id="Accordion" tab_id="Accordion1" class=""]Accordion Panel #2[/acchead]
[accbody tab_id="Accordion1" in=""]Accordion Body #2[/accbody]
[/accgroup]
[accgroup]
[acchead id="Accordion" tab_id="Accordion2" class=""]Accordion Panel #3[/acchead]
[accbody tab_id="Accordion2" in=""]Accordion Body #3[/accbody]
[/accgroup]
[/accordions]
Calendar
[event_calendar category_id=""]
Tabs
[tabs]
[tabh]
[tab id="Tabs0" class="active"]TAB HEAD 1[/tab]
[tab id="Tabs1" class=""]TAB HEAD 2[/tab]
[tab id="Tabs2" class=""]TAB HEAD 3[/tab]
[/tabh]
[tabc]
[tabrow id="Tabs0" class="active"]TAB CONTENT1[/tabrow]
[tabrow id="Tabs1" class=""]TAB CONTENT2[/tabrow]
[tabrow id="Tabs2" class=""]TAB CONTENT3[/tabrow]
[/tabc]
[/tabs]
Full width video
[fullscreenvideo videourl="https://www.youtube.com/watch?v=QiZm2VYiSfw"]
Toggles
[toggles id="Toggles"]
[togglegroup]
[togglehead id="Toggles" tab_id="Toggles0"]Toggle Panel #1[/togglehead]
[togglebody tab_id="Toggles0"]Toggle Body #1[/togglebody]
[/togglegroup]
[togglegroup]
[togglehead id="Toggles" tab_id="Toggles1"]Toggle Panel #2[/togglehead]
[togglebody tab_id="Toggles1"]Toggle Body #2[/togglebody]
[/togglegroup]
[togglegroup]
[togglehead id="Toggles" tab_id="Toggles2"]Toggle Panel #3[/togglehead]
[togglebody tab_id="Toggles2"]Toggle Body #3[/togglebody]
[/togglegroup]
[/toggles]
A documentation is also created to describe the functioning and working of shortcodes in NativeChurch Plugin
Grid system
NativeChurch is based upon Twitter Bootstrap css framework that is very easy to use and adapt. It follows the mobile first approach to make the website readily available for all devices and screen sizes. Bootstrap grid is based upon 12 columns that are well defined in the bootstrap.css file inside the css folder. You can get to know about the grid system in detail from this url http://getbootstrap.com/css/#grid
Icons font
NativeChurch used font awesome icon fonts for its icons requirement and no images has been used for any icon. A complete list of icons along with the class names can be found here: http://fontawesome.io/cheatsheet/
To use an icon on any page of the theme use the below code:
All icons class name will always start with the fa- . There are several sizes for icons are predefined in the fonts.css inside css folder. i.e. fa-lg, fa-2x, fa-3x
Changing color schemes
NativeChurch comes with 10 predefined color schemes to use it handy. To change the color of the website navigate to Theme Options > Theme Color Options
Configuring your Twitter Feeds Widget
New twitter api needs you to get an app information to show widgets on your website or blog. Here are the steps to get that information for this widget
- Go to https://dev.twitter.com/apps/new and log in, if necessary
- Supply the necessary required fields, accept the TOS, and solve the CAPTCHA.
- Submit the form
- Copy the consumer key (API key) and consumer secret from the screen into your application
- Ensure that your application is configured correctly with the permission level you need (read-only, read-write, read-write-with-direct messages).
- On the application's detail page, invoke the "Your access token" feature to automatically negotiate the access token at the permission level you need.
- Copy the indicated access token and access token secret from the screen into your application